Using docker images for development is a super power, you don’t need SQL installed on your development machine, yet you still have the full power of SQL there for you when you need it, and if you want specific versions for different projects you can simply spin up the version you want, and keep all the configuration inside a dockerfile in your repository for that project.
In this article we are going to:
- Download the latest SQL Server docker image locally
- Create a docker container and connect to it from SQL Server Management Studio
- Setup a volume mount to store the database files outside of the container so we can persist the data when we tear down our container.
- Set this up with a docker-compose file
1. Download the SQL Server docker image
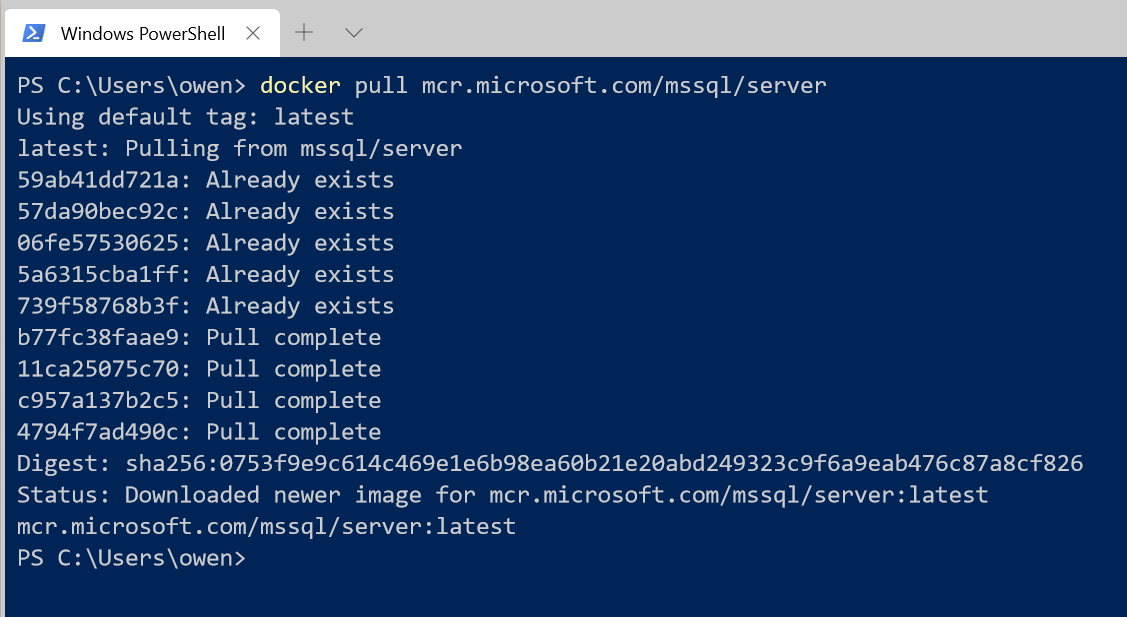
We need to pull down the SQL Server docker image from the container registry with the following command:
| |
You should see something similar to the following image:
2. Run the container
Now that we have the sql server image locally, it’s time to run the container.
We need to specify several parameters to do this:
-e or –env - This is where we set the environment variables needed by the container
-p or –publish - This publishes a containers ports to the host ports specified
–name - Sets the name of the container
-d or –detach - Runs the container in the background (detached)
SQL Server needs us to set 2 environment variables, first to Accept the EULA agreement, and secondly to set the SA password.
| |
The output of this looks like this:

You can see that the command spun up the container and returned the new container ID, then stayed running in the background, leaving our terminal free to run more commands (this is the detached parameter we ran).
Check what containers are running
| |
As you can see below, we now have our sqlserver container running with the same container ID that it displayed before, it shortened the ID tho, so we only see the first part.

Connect to SQL Server from Management Studio
Now lets connect to the container with SQL Management Studio, and create some tables.
Fire up Management Studio, and connect to localhost, with username sa and the password we set in the docker run command Sample123$
You should now be connected to the database running in the container, you can go ahead and add a database and a table, and insert some data. But when we remove the container, and then run the container again our data will be gone.
Remove the container
To remove the container we first must stop the container, and then we can use the docker container rm container_name command to remove it.
| |
Check the container has gone
Now when we run docker container ls we see the container is gone
| |
Run the container again and check the data is no longer there
Now we can run the exact same docker run command as before:
| |
Check that it is running with docker container ls
Connect to SQL Server from Management Studio again as before
Connect to the database with Management studio and we can see that the database has gone. To persist this data we need to setup a volume mount point, and point our container there.
3. Create volume mount point for persistent data
We can create a volume mount point which will make a location on the local disk the stored location for the database files inside the container, this way each time we remove the container we will be able to retain
| |
4. Set this up with a docker-compose file
To save having to to remember/type all of these parameters each time we want to use our SQL database, we can do the exact same thing with a docker-compose.yaml file. This will mean we can just run a single simple command and all the parameters will be contained in the yaml file.
Realistically this is much easier, as generally I have so many containers I don’t want to have to remember everything about each of them.
Take the below code, save it as docker-compose.yml in your project root.
| |
Now instead of having to type the long command from before all we have to type is the following:
| |
Connect to the database with Management Studio
Now you can connect to the database with Management Studio, add data and use as normal. You can then stop and remove the container and retain all the data in the volume you specified. This data can be test data that you store somewhere central so that your whole team can share it and of course version it, or somewhere local to you.